
Undoubtedly, the entire squat exercise is a fundamental Primal movement, yet a lot of people in today’s industrialised culture struggle to squat properly. Children squat with good form. Simply observe them while they play. To reach an insect crawling on the ground, pick up a rock or shell, manage toys on the floor, or achieve eye level with the family pet, they squat with their knees completely bent and their feet flat.
The same should be possible for adults. Since a deep squat is one of the classic resting postures, it should be possible for us to all comfortably hang out in one while conversing or performing simple tasks. Sadly, most adults (as well as most older children and teenagers) find it difficult to even perform a basic “ass-to-grass” squat, let alone a high squat with their thighs parallel to the floor.
 Even worse, a lot of people have been misled by health professionals and personal trainers into believing that the full squat is harmful, that it will wear out your knees and prevent you from engaging in daily activities. They claim that a half-squat is more than sufficient, or even better, to utilise the leg extension machine in place of the squat entirely. (Avoid it!)
Ignore these so-called experts. When done correctly, which is what we’re going to talk about today, squatting is a safe, natural human movement that has many advantages for general fitness and everyday mobility. Although you don’t have to use a lot of weight, you must have sufficient mobility and flexibility to do a full squat below parallel.
Correct Form for Squats
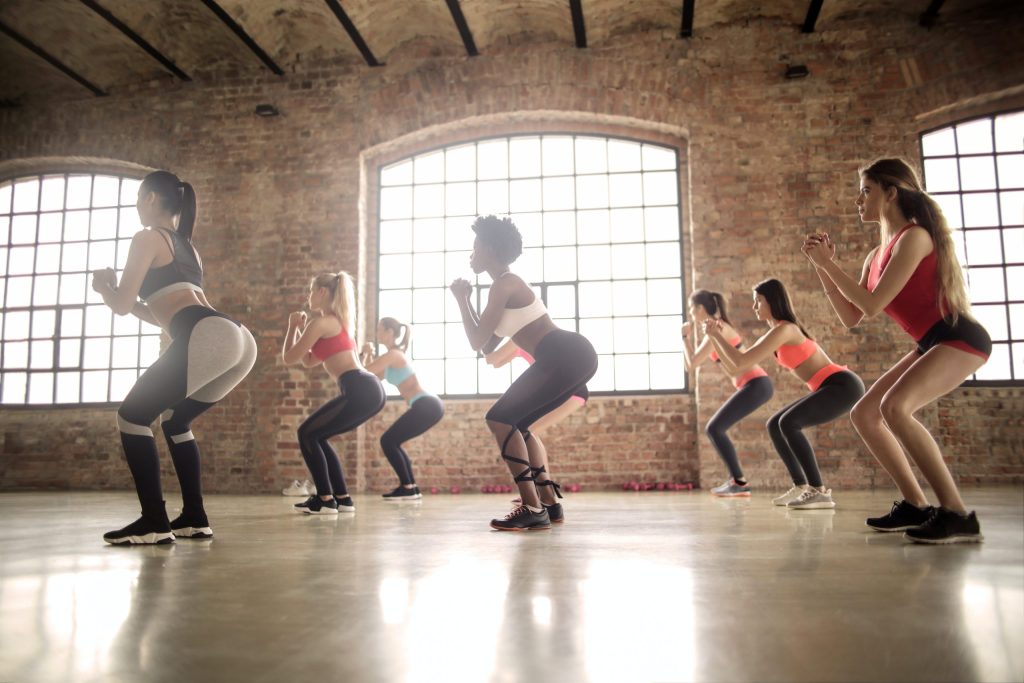
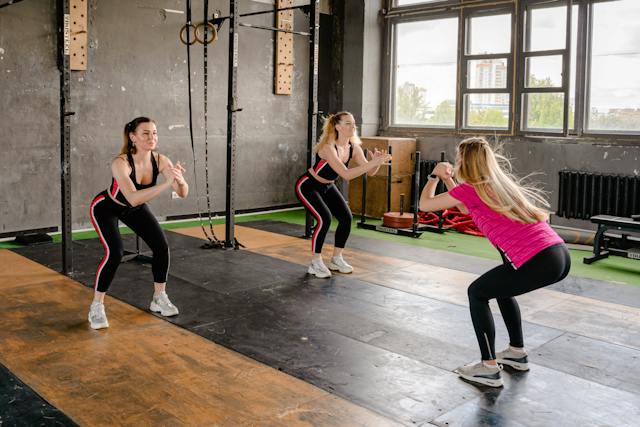
Whether performing a weighted squat with a barbell or other equipment, or an unweighted “air squat,” which is also known as a bodyweight squat, proper form is essentially the same. Before progressing to weighted variations, it’s critical to master the fundamental form and gain proficiency in the air squat.
Now that you’re standing, try completing an air squat with proper form by paying attention to these cues:
- Take up the first position
spaced roughly shoulder-width apart. The best method is to jump straight up into the air a few times with both feet, landing with soft knees, to determine the natural, comfortable distance for you. Take a moment to gaze at your feet. What is the distance between them? That’s a wise spot to begin.
Toes spread out by five to twenty degrees. You should only spread your toes as far as it takes you to feel comfortable. The better, the more forward-facing. (Toes will stick out more in squat versions with a wider stance, such sumo squats.)
“Screw” your feet firmly into the earth. Imagine driving your left foot into the ground anticlockwise and your right foot into the ground clockwise. “Press the lateral heel,” which refers to feeling and concentrating on the outside portion of your heel pressing into the ground, is another helpful cue.
Core firmly held. Before you squat, brace, and maintain your tightness throughout the entire exercise.
top posture in neutrality. The spine includes the neck. To keep your head stacked on your spine, keep your eyes forwards and slanted slightly downward.
- Start the downward dog.
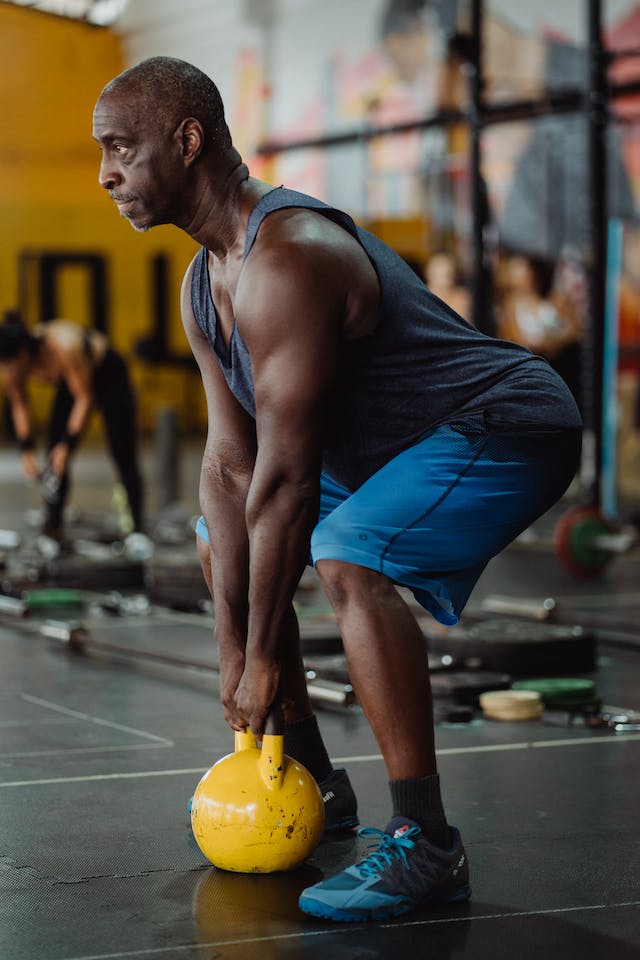
rear hips. Picture yourself reaching back with your butt to find a chair that is behind you. That’s the ideal feeling for a squat.
feet and knees in alignment. Make sure your knees do not “valgus,” or bend inward, while you keep them tracking towards your toes. (Contrary to popular belief, as long as you keep your hips back, it’s okay if your knees extend slightly past your toes.)
neutral spine, chest up. As you come out of the squat, maintaining an upright chest and an arched back will help you “aim” in the correct direction. This becomes more significant when you are carrying a lot of weight.
- Dive as far as you can without breaking down.
Some will bend their knees all the way down to the grass. Others will round their backs or place all of their weight on the balls of their feet before they can even bring their thighs parallel to the floor.
Go as low as you think is safe.
- Get back up to your feet
In one smooth action, reverse the movement by pressing through your heels and push your hips forwards to take up a normal standing position again.
Typical Squat Errors to Avoid
How went that? Try a few repetitions, but be careful not to make these typical squat errors.
breaking first at the knees. Rather than bending your knees at the beginning of the squat, push your hips back.
allowing your knees to buckle. While valgus knee in a bodyweight squat might not be fatal, it is an excellent way to rupture a meniscus when combined with additional weight or when performed quickly. Consider the cue “knees out” in order to prevent knee valgus.
stepping onto your toes. This can put a great deal of unnecessary strain on the knee joint, particularly while squatting with a load, and make it difficult for you to maintain an erect thoracic posture. While some “lean” is natural and anticipated, it’s a sign of tight calves and restricted ankle mobility if your heels need to rise off the ground. Prior to engaging in any significant squats, strengthen your calves and improve your ankle mobility.
hips first when standing up. This is something I see frequently. People will elevate their hips while maintaining their chests near to the ground, bending forwards instead of raising their chests in a single, unified motion when coming up from the squat. This eliminates the legs from the squat and puts a great deal of strain on the lower back, making it more equivalent to a deadlift or good morning. When you stand up, think “chest up.”
keeping the parallel intact. According to research, when your thighs are parallel to the ground or at a 90-degree angle during a squat, the compressive and shear forces pressing on the knee are at their highest. In fact, the compressive and shearing forces decrease when the angle drops below 90 degrees, or a deeper dquat. If you are unable to go any lower, it is probably safer to stop before you reach parallel than it is to halt then.
tumbling or “dropping” to the floor. Manage the descent. It is more probable that you will get hurt, get lazy, and sloppy if you are falling or slumping into the bottom of a squat. Slow down to think faster up.
Squat Advancements to Improve Your Technique
Step 1 of the squat progression: Get help
Locate a sturdy object to provide support, like a wall, bar, pole, or chair back. As you squat, hold onto it and experiment with your range of motion. Prior to on to progression 2, try to complete 20 to 30 of these aided squats with proper form.
Second progression of the squat: no help, with a spot
When practising your entire squat form, use a box or a bench as a “spotter.” Maintaining your arms in front of you for balance, stand in front of the bench and reach back with your hips as though you were going to sit down. Get up when your thighs or butt are barely touching the bench.
Step 3 of the squat progression: You’re alone!
Remove the bench in order to perform a complete air squat. As low as you can go, using your heels rather than your toes to press upward. You’ve successfully executed an air squat!
Practise, Practise, and more Practise
Being able to squat is human. To investigate and live within the entire range of motion possible for our bodies. It is to continue being youthful, nimble, and mobile. At seventy, you will be in the 99th percentile and should be spared most of the functional degenerations and physical ravages of ageing if you can still sit in a full squat.
Go slowly and gently into it. Most people have tight hips, quads, and Achilles due to the modern “conveniences” of vehicles, couches, and chairs. They also lack expertise in the correct squatting position. Reaching this position from the start could be difficult. Nothing has to be forced here, and there is no hurry. The top priority is to prevent injuries. To achieve your objective, you may need to take small actions over the course of several days, weeks, or even months. (Remember this for all your exercise objectives.)
After mastering the air squat method, you can progress to various squat alternatives (there are several to try), such as weighted squats where you place a loaded bar across your back. You should still perform air squats throughout the day or hold a deep squat for a few minutes, even if you’re using the gym’s squat rack and squatting twice your body weight. These little exercises, which involve air squats, will help you maintain and strengthen your mobility, particularly if you spend a lot of time seated.